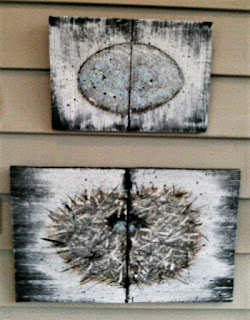
Easter Decorating made easy. Primitive, and Stunning Easter Crafting in no time at all!
Looking for a not so typical Easter Craft Project that the entire family can take part in
Look no further, because here it is. Not only do these pieces look great, but they really are easy, and quick to do, and will certainly brighten up your home for the Easter Season. In fact they are nice enough to leave out all year long!
Though the video will explain everything you need to know step by step, I will also post some of the photos, and give a brief synopsis of what I have done to create these one of a kind little art projects.
After you have picked out your wood shapes, you can base coat them in black. Black is very important, because you will be uncovering some of that color latter in the process.
Dry brushed a little white on top of the black, tie a jute cord in the middle (if you wish it to look like two boards when you are finished). Next you can begin layering your colors. I chose brown, then beige, blue, and finally a little white.
For the birds nest, get a tool with a sharp end to scrape across the nest to simulate sticks. When you scrape it you will see the black underneath is what helps the nest to look like many separate sticks woven in to a nest.
Finally, spatter black on to the pieces with a tooth brush. Doing this will add depth to the piece, and believe me, it does a lot for the finished project.
Now you can remove the jute cord (if you used it) I also used 2 screws, and jute cord on the back to create a way to hang the boards.
I hope you will try this fun, and different kind of Easter Craft for your home, and please let me know what you thought of it!


No comments:
Post a Comment