Creative ideas, and decorative items, and techniques that I have used in my home, or would like to use. DIY, and how to post and videos of things that I am working on in my own house. I also encourage all of you to share your own thoughts, photos, and projects.
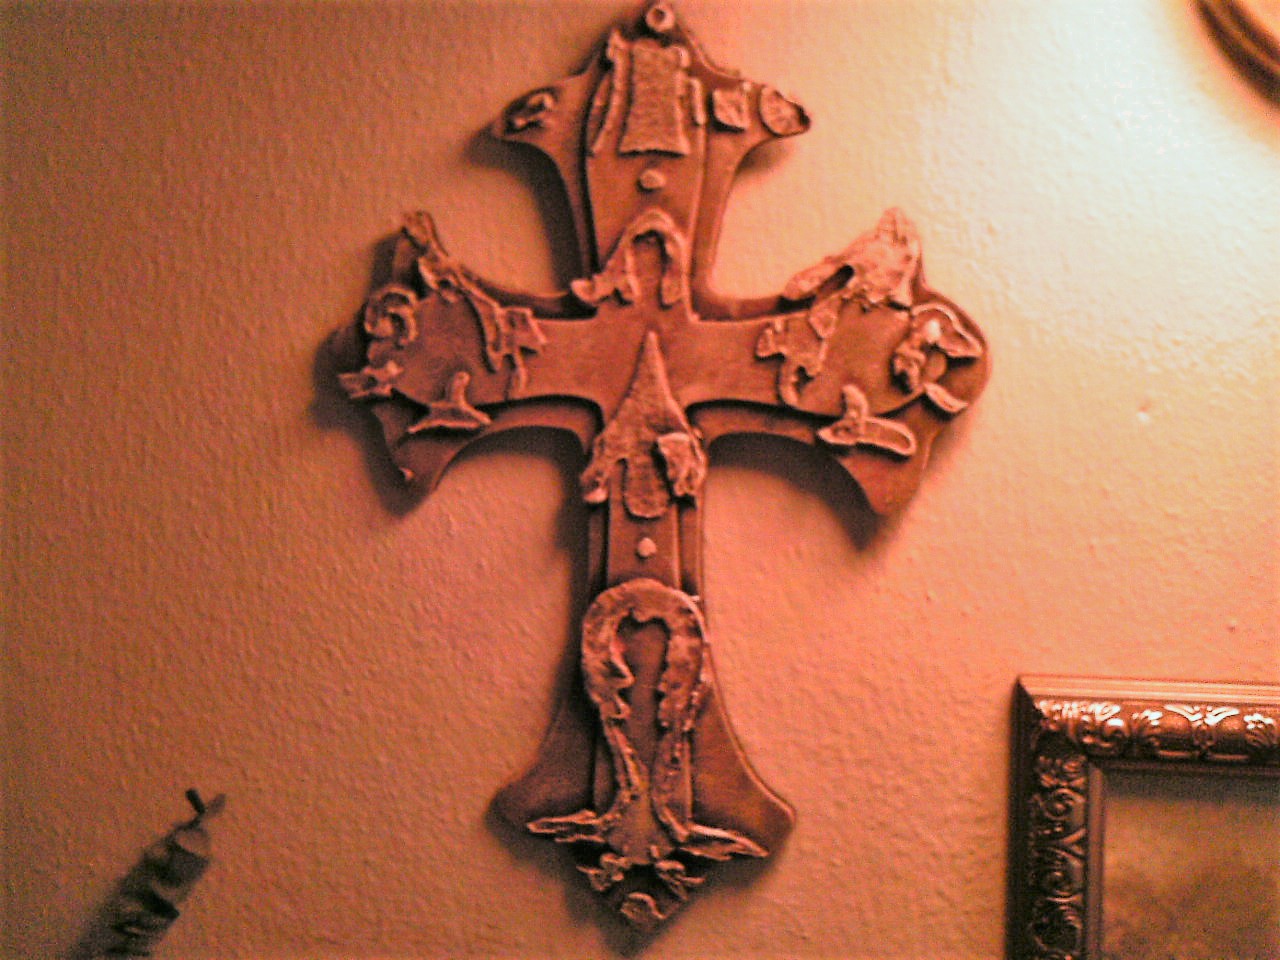
From Dollar Store Find to Celtic Cross in no time.
Amazing craft Projects from a great YouTube Channel.
Don't forget to Subscribe to the Channel for more Crafty Ideas!
We begin by using our plaster stencil to add a 3 dimensional design to the plain wooden cross. I centered the stencil on top of the cross, and applied the plaster to the stencil. Let dry overnight before moving on to the next step.
Apply your first color of acrylic paint. I have chosen black so I will have that darker color in the crevasses when it is finished. It also helps to achieve that aged look. Allow that color to dry.
For the next step, dry brush your next color on top of the black, being careful not to coat the entire cross, and cover the black. Remember we want that black to show at the end.
I also added a light beige to the top areas of the plaster to further highlight the details. After this step you are done, and ready to hang your new Celtic Cross in your home. How easy was that, and the effect is indeed amazing! Please don't forget to Subscribe to the YouTube Channel for more craft projects to come in the future.
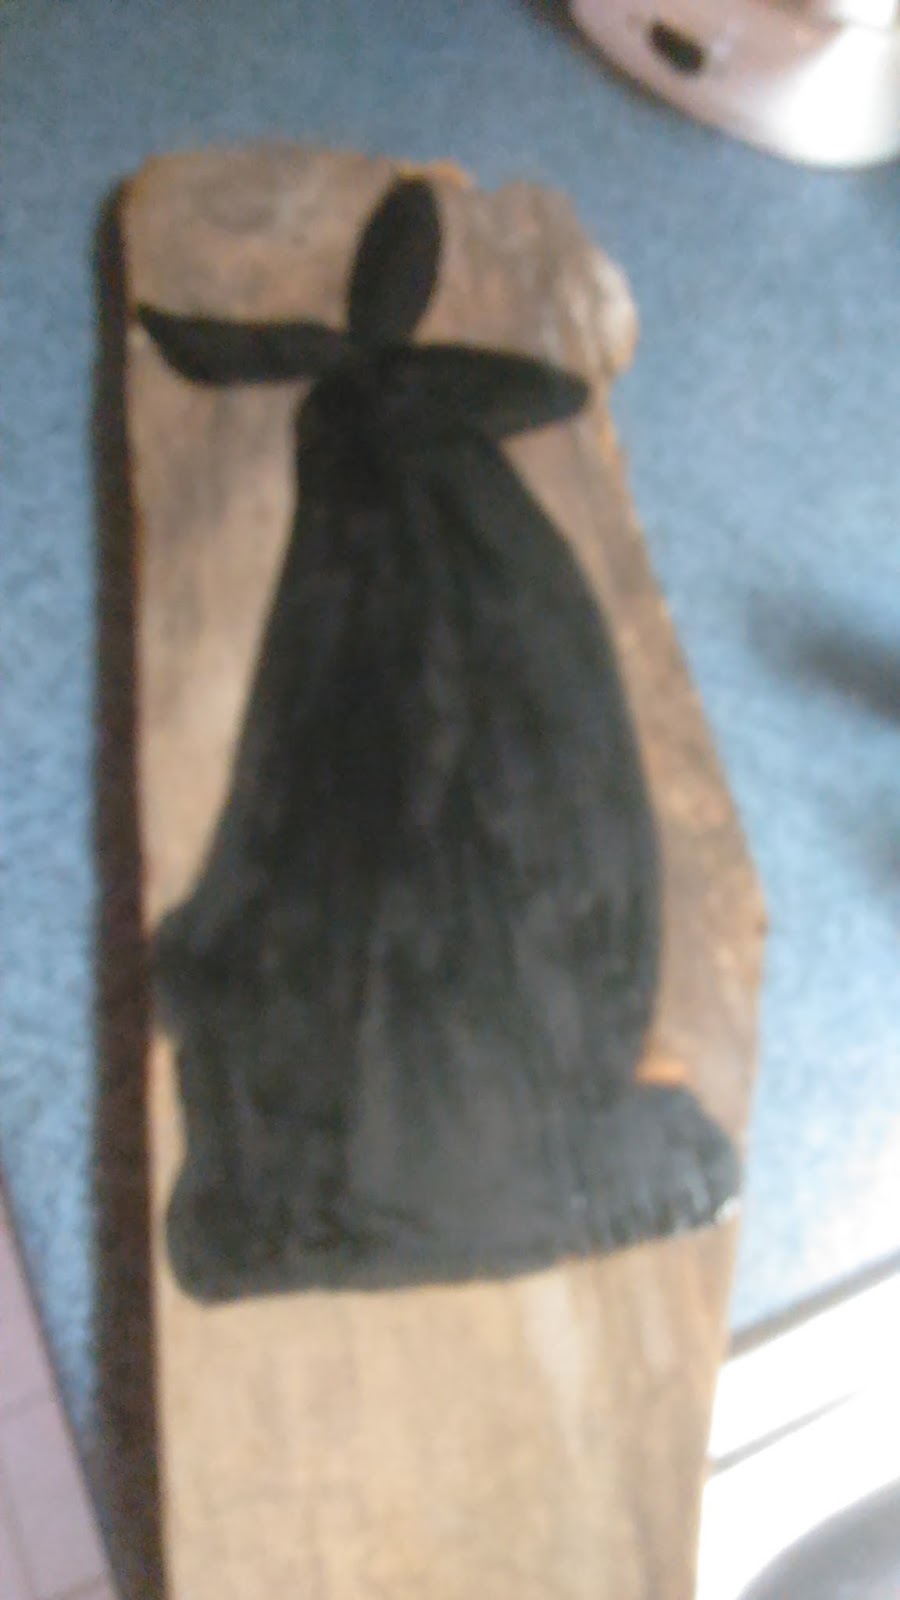
First a Primitive Rabbit on Wood, and Second a Cardboard Cut Out Bunny
Like most of my homemade crafts, I like them to be done in a very short period of time, and made from things that I already have in the house, and recycled materials.
First for the primitive Rabbit on wood, I went down to the basement and chose a piece that I thought I could work with. I sanded it, to clean off the dirt, and then drew the outline and painted my rabbit silhouette in black acrylic. Don't over think it, just draw and paint it.
Next I highlighted areas in white, like the arms, tail, mouth ears, and eyes. Finally, to give it an aged look, I sanded away some of the paint. I finished it by giving it a coat of polyurethane. Finally, the fun part, I hang it outside the front door.
On to the next bunny.
First I got my piece of cardboard, and drew the shape of bunny I wanted. Easy enough.
Next I was ready to cut out the bunny, and I painted it with a brown paint, but feel free to make it any color you choose.
I then spattered black paint using a tooth brush, cut and ties a ribbon around it's neck for decoration, and after that the bunny was all ready for Easter. If you choose to try out any of these craft projects please let me know how it went!