Fall is here, and money is tight, but don't worry...This YouTube Channel has this video, and many others designed to save you decorating money all the time!
Here is another good looking, and cheap Fall/Halloween craft idea anyone can make.
Please subscribe to the YouTube Channel if you haven't already for more paintings, and crafty ideas!!!
Showing posts with label ideas. Show all posts
Showing posts with label ideas. Show all posts
Wednesday, September 21, 2022
Tuesday, February 1, 2022
Easy and Inexpensive French Country Decor
Here is a very quick ans easy addition to your French Country Decor. All you need is a piece of wood, and a print, of your choice, from the printer. We stained the wood, glued on our print, and polyurethane for a nice finish, and we were all done! Now it graces the porch with the rest of the French Country greeting.
Monday, November 22, 2021
How to get the French Country Christmas Look! 60 plus photos for Inspira...
Today we are learning how to create that French Country Christmas look for very little money, and using what you would already have around the house. You need only your old pieces, glass bottles, white, or metal vases, greenery, and sticks from the yard, favorite light colored Christmas ornaments, light throws, pillows, picture frames, and such. Watch for inspiring ideas. It's really pretty simple to do, and takes very little time. It's fun just going around the house looking for everyday objects to add to your own look! Please Subscribe to the YouTube Channel for more!!!
There is something very calming, ans screne about a French Country Christmas, and for everyday for that matter. As the years go by I am using it more, and more in the house. Below are some of my ideas for this Christmas.


There is something very calming, ans screne about a French Country Christmas, and for everyday for that matter. As the years go by I am using it more, and more in the house. Below are some of my ideas for this Christmas.


Wednesday, September 2, 2020
A Summer to Fall Decorating Makeover. All New Ideas
Just in time!
A Summer to Fall Magical Makeover! Filled with ideas you can use to spruce up your home!!! We go through each room downstairs in the Old Haunted House, and bring it to Fall Life all in one video!
A Summer to Fall Magical Makeover! Filled with ideas you can use to spruce up your home!!! We go through each room downstairs in the Old Haunted House, and bring it to Fall Life all in one video!
Thursday, August 27, 2020
Fall Halloween Wooden Cats. Easy Crafts!
Fall Halloween Wooden Cats to decorate the home during the fall season. These are very simple to make out of left over boards, and so quick you won't believe it. #DIY #EasyCrafts #Fall #Halloween
Friday, February 28, 2020
A DIY Kitchen Island You Can Make Yourself and SAVE
Do you want a Kitchen Island that looks like an old piece of furniture, but you don't have a lot of money to spend on one? Why not make your own inexpensive one, and it can be just how you want it to look. Here is what I did for my kitchen out of an old shelf stand that was in the basement when I bought the house.
Monday, April 2, 2018
Springtime in the Kitchen, it's time!
Let's Add a Little Color to the Place We See the Most.

Admit it, we're all tired of winter, and it's time for a bright and sunny change. How about we begin in the kitchen, at the table. It's a place we see a lot, and it's also a place which can alter our mood. We might as well alter that mood in the right direction.

No matter the color of your kitchen you can bring in the bright, and sunny colors of spring just by adding a little dash of yellow here and there. Yellow can quickly grab attention. Yellow is a bright that is often described as cheery and warm. Yellow can also increase the metabolism. Since yellow is the most visible color, it is also the most attention-getting color. Yellow can be used in small amounts to draw notice to an area you wish to feature.

I took this side table in the kitchen, which until recently had been decorated with an Easter theme, and changed it to spring. First I took away the Easter trimmings, and placed a large bowl with dried gourds, and a cardinal inside, and added a couple of other pieces that reminded me of spring. I also placed 2 glass vases with white sticks (leftover from Christmas) and put in just a few little yellow flowers, immediately drawing attention to that table, and it's happy setting.
Yellow Is Cheerful
For many people, yellow is seen as a bright and cheerful color. Advertisers may use it to not only draw attention, but also to evoke a sense of happiness.
Now on to the next setting... The main Table.

For the Kitchen table I have used blues, and whites. I gathered various old pieces, trays, a coffee pot, a floral pitcher, and white ceramic cherub candle holder among other things. I also put blue and white hydrangeas in the pitcher, and set out matching blue and white tea cups.
There is a blue runner on top of a cream tablecloth, and a white lace runner on the top of that, with cream lace doilies on either side.
Blue is described as a favorite color by many people and is the color most preferred by men. Blue calls to mind feelings of calmness or serenity. It is often described as peaceful, tranquil, secure, and orderly.
White is considered a powerful color in feng shui, a system of arranging your environment to create harmony. Colors are linked to certain feng shui elements and in the case of white, the element it expresses is metal. Wood and glass accents go extraordinarily well with white.

What ever colors you choose for your springtime table settings, be sure that it is those colors that make you truly happy, and relaxed. Home is suppose to be a haven, and a cluttered haven is not so good. There is a reason for "Spring Cleaning". Have fun with it, and make it a happy place!
Thursday, March 8, 2018
Easy Easter Crafts: Cardboard Cut Out and a Primitive Rabbit on Wood Hom...
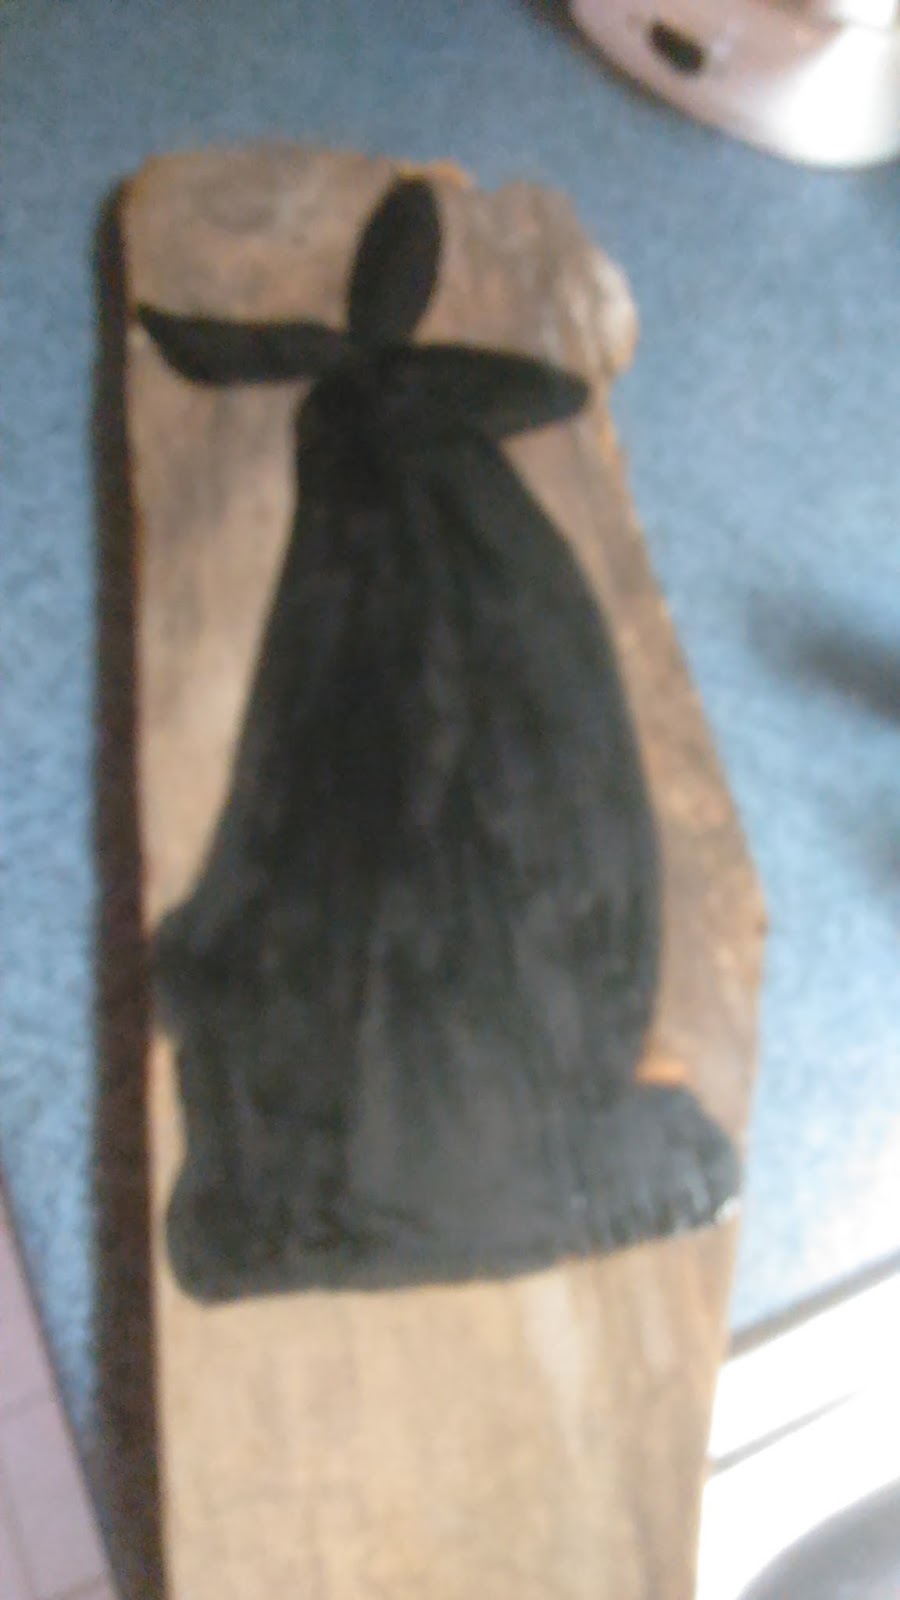
Two East and Enexpensive Easter Crafts
First a Primitive Rabbit on Wood, and Second a Cardboard Cut Out Bunny
Like most of my homemade crafts, I like them to be done in a very short period of time, and made from things that I already have in the house, and recycled materials.

First for the primitive Rabbit on wood, I went down to the basement and chose a piece that I thought I could work with.
I sanded it, to clean off the dirt, and then drew the outline and painted my rabbit silhouette in black acrylic. Don't over think it, just draw and paint it.

Next I highlighted areas in white, like the arms, tail, mouth ears, and eyes. Finally, to give it an aged look, I sanded away some of the paint. I finished it by giving it a coat of polyurethane. Finally, the fun part, I hang it outside the front door.

On to the next bunny.
First I got my piece of cardboard, and drew the shape of bunny I wanted. Easy enough.
Next I was ready to cut out the bunny, and I painted it with a brown paint, but feel free to make it any color you choose.


I then spattered black paint using a tooth brush, cut and ties a ribbon around it's neck for decoration, and after that the bunny was all ready for Easter. If you choose to try out any of these craft projects please let me know how it went!

First a Primitive Rabbit on Wood, and Second a Cardboard Cut Out Bunny
Like most of my homemade crafts, I like them to be done in a very short period of time, and made from things that I already have in the house, and recycled materials.
First for the primitive Rabbit on wood, I went down to the basement and chose a piece that I thought I could work with.
I sanded it, to clean off the dirt, and then drew the outline and painted my rabbit silhouette in black acrylic. Don't over think it, just draw and paint it.

Next I highlighted areas in white, like the arms, tail, mouth ears, and eyes. Finally, to give it an aged look, I sanded away some of the paint. I finished it by giving it a coat of polyurethane. Finally, the fun part, I hang it outside the front door.

On to the next bunny.
First I got my piece of cardboard, and drew the shape of bunny I wanted. Easy enough.

Next I was ready to cut out the bunny, and I painted it with a brown paint, but feel free to make it any color you choose.


I then spattered black paint using a tooth brush, cut and ties a ribbon around it's neck for decoration, and after that the bunny was all ready for Easter. If you choose to try out any of these craft projects please let me know how it went!

Tuesday, February 13, 2018
No Cost Low Cost Exquisite Easter Crafts you can make Yourself. Primitive Rabbit
Looking for an easy DIY Craft for you and the kids?

How about this primitive Rabbit? It looks great, it's very easy, and may cost you nothing to do. Also, if you have kids, it's simple enough that they will find it fun too!
A Primitive Easter Rabbit, or even for an everyday decoration in the home, that you can make by yourself in about an hour. This is a very easy no cost, or low cost craft that is fun, and quick for anyone to try out.

Begin by drawing your selected image onto the piece of cardboard. I know, it's cardboard, but don't worry, it's going to look great when you are finished. You won't believe your eyes.
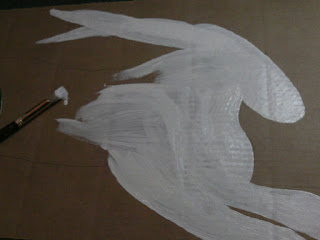
Paint your image. Don't worry about the areas that show through underneath, it will only add to the "aged" look of the piece. After all, it is a primitive, and that is what gives them their charm.

Next you can add your shading, and spots of "wear" to the piece, and cut it out. Note: For me, cutting it out was actually the hardest part of the entire prokect. Now the fun part! It is ready for a little fancy decorating, as you see fit. I used a few twigs from the yard, Spanish moss, and left over ribbon for mine.

You are all finished, and ready to put it on display. These pieces are very fast, and also easy enough for kids to do as well.
Below are a few more Rabbits that I have added to my collection, and as you can see, they are wonderful, fun, and festive! I hope you try this project, and as always, if you do...let me know!

The Dining Room Table Rabbit

Rabbit in the Fireplace

Two Bunnies in a Bedroom
Wednesday, January 24, 2018
How to make a Primitive Wooden Valentine Heart DIY Craft

This Primitive Wooden Valentine Heart is certainly one of them. It's so easy that your kids will have fun making it as well.
Just a few items that you need, and most probably already have, and you are on your way to having a lot of Valentine's day fun!
Tuesday, January 23, 2018
The Old Haunted House is all Decorated for Valentine's Day

Now is the time to be thinking of what you will be doing for Valentine's Day, and how you want your house to look. You could come home to a very happy, and romantic place with just a little embelishing. Doesn't that sould like fun.
Join me in this Valentine's day House Tour, and maybe walk away with a few DIY ideas of your own!
Friday, July 14, 2017
You Don't Need A Lot Of Money To Have An Interesting Garden


I had been wondering for awhile what I was going to do with this 40 foot wooden ladder that was no longer safe to use. Someone I knew showed me how they had made one into a little garden fence. That got me thinking about my garden, and what it needed. It only took a few minutes to see that yes, you could make a trellis out of an old wooden ladder, and the next day I did just that.


The Old Garden Signs


Monday, January 9, 2017
How to make a Burlap Wreath a DIY Tutorial
I hate the thought of spending money on things I think I can do myself, so we are going to make a Spring/Summer wreath decoration for my entry door. As it turns out it is very easy, and inexpensive, and fun as well!
Monday, December 12, 2016
How to make your own outdoor Christmas Tree Decorations from Recycled Wood
DIY Outdoor Christmas Tree Decorations
 I had some left over old lattice lying around, and wanted to put it to good use. I also needed new Christmas Decorations for the front yard, and I like that "Primitive" look, or rustic, whatever you like to call it. Anyway I had this lattice, and the idea came to me...Christmas Trees! As mentioned in the video the most time consuming part was painting the lattice, but other than the white paint (which I already had) the cost was really nothing. I reused old nails, and the lattice, so it really cost me nothing but the time, and you have to put your time to good use. Let me know if you like this, and the projects that you have done yourself. Who knows...I may get some ideas from you.
Below I will go through all of the steps that I took in the video to make my Primitive Christmas Trees.

1: I picked out the shape that I wanted for my Primitive Christmas Tree, and began to cut the lattice. I placed it going across a vertical piece of wood. and drew a line down each side, following a tree shape. I then Cut the pieces, and nailed them to the vertical piece of wood (the trunk). 2: I then chose the color that I wanted to paint the tree, and proceeded to go about painting it. This did take a little while, and since the lattice had been painted before I had to give it more than one coat, but I had expected that. I painted both the front, and back just to make sure that it would be sealed from the weather.
 3: You may, or may not do this next step... I decided that where I was placing the Primitive Christmas Tree was too large for just one tree, so I made another one. This tree was made in a different way, but the set up is much the same. Place the lattice on your vertical piece of wood, and trim accordingly.
 4: Again, after you have cut, trimmed, and nailed your lattice to the vertical piece of wood in your choice of tree shape you then paint it. I attached a picture hook on the back of each tree so they would hang up on the wall. and my trees were now done, and ready to decorate the front of the house for Christmas. This only took me a few hours, and cost nothing since I already had all of the materials on hand. Definitely worth the time spent doing it.


Below I will go through all of the steps that I took in the video to make my Primitive Christmas Trees.

1: I picked out the shape that I wanted for my Primitive Christmas Tree, and began to cut the lattice. I placed it going across a vertical piece of wood. and drew a line down each side, following a tree shape. I then Cut the pieces, and nailed them to the vertical piece of wood (the trunk).


Wednesday, December 7, 2016
How To make your own Primitive Snowman for the Holidays
DIY Primitive Christmas Decorations
This is probably one of the easiest, and quickest craft projects that I have done yet. It's very simple, and yet, it looks really good in the house. #ChristmasDecorating
You could also try your hand at Sock Snowmen!


This is probably one of the easiest, and quickest craft projects that I have done yet. It's very simple, and yet, it looks really good in the house. #ChristmasDecorating
You could also try your hand at Sock Snowmen!


Tuesday, December 6, 2016
It's Christmas Time, House Tour, and Decorations!
Take a tour of an old Victorian house at Christmas Time.
 Hand made decorations, twinkling lights, vintage sights, and more! Singing you to sleep with a parody of Have Yourself a Merry little Christmas the old timey way without music.

Subscribe to:
Posts (Atom)