"http://dddavidsghostcams.org/Privacy_Policy.html" Easy Inexpensive Decorating Ideas, on a Budget: Fall
Showing posts with label Fall. Show all posts

Tuesday, October 4, 2022

Decorating from Fall to Halloween How To


IT'S TIME FOR DECORATING AGAIN, AND IT IS FOR THAT VERY SPECIAL NIGHT OF ALL HALLOWS EVE!
Join me, in the Old Haunted House for new, and spooky Halloween ideas, and frights to behold. Most everyones second favorite holidays to dress up the home for, and it takes nothing but imagination, and just a little fun work.

Wednesday, September 21, 2022

Easy to make Accessory Box for Fall Halloween or Everyday

Fall is here, and money is tight, but don't worry...This YouTube Channel has this video, and many others designed to save you decorating money all the time!
Here is another good looking, and cheap Fall/Halloween craft idea anyone can make.

Please subscribe to the YouTube Channel if you haven't already for more paintings, and crafty ideas!!!

Monday, August 29, 2022

Fall Decorating Before and After Photos with All New Ideas, and Styles!

Fall, a wonderful time of year, and what better way to celebrate it than to dress up the house!
Here we have quite a few new fall decorating ideas for you to see, and maybe even use in your own home.

Thursday, October 14, 2021

Easy Fall Crafts I have made, and you can too!

Here we have 3 very easy to do Fall craft projects you can make by yourself, or with the kids. Easy enough that everyone can get involved.

Decorating for fall doesn't need to cost a lot of money, just use what you already have, and change it up a little. Using your imagination is all of the fun, and you come up with a unique look for your home!

Wednesday, August 25, 2021

A Fall Porch French Country Makeover! Step by Step.

Today we are giving the front porch a French Country Fall Makeover. We are keeping it mostly light in color with a few yellow/orange accents. As always we have added a few new craft items, which I show you how to make, and the entire makeover cost 0 dollars, with the exception of the new 2 rugs, as we have used what we have already had in the house.

Thursday, September 10, 2020

A Summer to Fall Porch Makeover Let's Get Busy Decorating!

Get ideas, and inspiration to make your very most important welcoming point a Happy Place to visit! New ideas, and easy crafts for this year! Fun for the entire family.

Wednesday, September 2, 2020

A Summer to Fall Decorating Makeover. All New Ideas

Just in time!
A Summer to Fall Magical Makeover! Filled with ideas you can use to spruce up your home!!! We go through each room downstairs in the Old Haunted House, and bring it to Fall Life all in one video!

Thursday, August 27, 2020

Fall Halloween Wooden Cats. Easy Crafts!

Fall Halloween Wooden Cats to decorate the home during the fall season. These are very simple to make out of left over boards, and so quick you won't believe it. #DIY #EasyCrafts #Fall #Halloween

Friday, October 19, 2018

Scare up a Primitive Sock Ghost or two this Halloween


In no time you can have this happy little primitive ghost prominently displayed in your home for Halloween, along with your other cherished things. All you have to do is watch the video below to learn how to make it, or read the instructions below the video. You will be proud to add this new addition to your Halloween Collection.

All you need for this slightly spooky ghost will be an old white sock. I always seem to have those, and with more than a few holes. You will also need a little coffee, or tea, filler for sock, a small stick, some twine, acrylic paint, and a thin marker.
Step One: Dip your sock in coffee, or tea, and let dry overnight. This is to give us that aged look, and it will smell very good for a little while. :)
Step Two: Stuff your sock with some sort of filler (cotton, old rags, whatever you have). This is to form the body of your sock ghost, and will be on the inside of the sock, so it won't be seen.

Step Three: Place your stick in the top, and tie it with twine. I'm not sure why, but it gives the ghost a nice look, and we're after a nice finished look. At this point you may wish to adjust the body of your ghost to give it a nice oblong shape. Unless you want a short round ghost. That would be nice too, or even a few with a variety of shapes.

Step Four: Choose the facial features, and colors you would like, and paint it on your sock ghost. If you notice, I chose eyes to resemble small buttons, but if you like, you could sew on real ones as well. Allow the paint to dry before going on to the next step. It won't take very long.

Step Five: Take your marker and simulate sewing lines. This is to also add to that old primitive look.
That's all! You are now ready to find just the right place in your home for your new Ghost to live. At least for a little while.
This is another project that would be easy enough for the kids, and still look very good in the home. Happy Haunting!

Friday, October 12, 2018

How to make your own Fabric Ghost/Spirit for Halloween!

Have your own Resident Ghost this Halloween!

Think of the delight on the faces of your guest when they see your new resident spirit haunting your house. It is not as difficult as you think, and will certainly bring in that Halloween Spirit.

You can either choose to watch the You Tube Video above, or read the step by step directions below, or both! If you have not yet subscribed to the You Tube Channel, please do. I need all of the subscriptions I can get since You Tube changed their rules.

The first thing we do is make a shape for our head. I used plastic bags. Everyone has those, and usually too many. Here is a chance to put them to good use, and do a little de-cluttering of the kitchen at the same time.

Next we need a body. Here I used cardboard, but if you have a large doll, that would work too. Just cover it with plastic first.
When you have the shape you desire for the body, you can attach the head.
You might wish to try out your fabric on your shape to see how it looks.
I think we are getting into the "Spirit" of things here, and can now move on.

Next we move on to the fabric stiffener. I would say, if I should do this again, I will get the spray.
I think we are ready to begin the process. We will be pouring the liquid into the bowl, and placing the fabric into the bowl to cover it with the stiffener. You must cover all of the fabric. This part was very messy!

You are now ready to drape your cloth on to your body.
As you can see, I will be doing this outside. I have covered it all in plastic so it will be easy to remove when dry.
We now have the fabric covered with stiffener, and placed on our body.
You will have to arrange the fabric to give you the ghostly shape you are looking for.

When you have achieved the desired Spirit effect, you will then leave it overnight to dry. I left mind outside until I was ready to go to bed, and then brought it in, and sat it in a chair so it could dry the rest of the way. After just those few hours outside it was already pretty stiff.

Our new Ghost has found a favorite spot in the living room. I think she looks quite at home now. As you can see, it is a very life like spirit, and just the right size for a spectral apparition.
I hope you have found a little inspiration from this video, as with all of the others I have posted. Let me know how it turns out for you, should you decide try it out for your home.

Wednesday, October 10, 2018

Make New Ghostly Friends for Halloween!

How to make a Primitive Halloween Ghost Trio for your Home!

You can view the You Tube Video, or read the steps, and see the photos below. Either way you are going to love making these easy little Ghost for your home.

There 3 little ghost are fun and easy to make for you, and the kids. They don't take very long, so the little one's are sure to stay interested, and you will have New/Old Halloween Decorations!

We begin with 3 strips of old lattice. We have sanded off the dirt. We wouldn't want to paint over dirt. We have also cut notches, and slants into the wood for our ghostly shapes.

Now we paint them white. I first tried white spray paint. The spray paint did not hold, so I used white house paint. Live and learn.

Next we paint the eyes, and mouths. They are already looking ghostly, but we still have more to do! Next we move on to giving them a more primitive look.
We begin sanding the ghost here and there to resemble wear. See how it gives them an "Old" look. These are 3 happy fellows! I think we are almost done!

With the sanding all finished, we are now ready to pick out just the right spot to display them... I almost forgot, I rubbed on a coat of sealer at the end, and let that dry over night.

Here we are in out new ghostly haunting spot! They can't wait to greet all of the little Trick or Treaters! See how easy that was!
Please hit the "Like" button on You Tube, and don't forget to Subscribe for more!

Thursday, October 4, 2018

Make A Primitive, Spooky Halloween Trio!


It's that wonderful, magical, and haunting time of year again, and I have come up with a very quick and easy project to help get you in the Halloween mood.

Just follow the easy step by step instructions below, and you will be haunting in no time!


Begin by choosing your piece of wood. Draw the desired Halloween shapes you would like. Choose the colors, and begin painting. Remember, it's a primitive piece, so you don't have to be perfect.

One by one the project begins to take shape. As you fnish painting the base color you can begin to see what it is going to look like. Now we can begin putting in the details!

Give your ghoulish creature eyes, nose, and a mouth. A little touch of red on their eyes adds to the spookiness. I dipped a tooth brush in white paint, and spattered the entire piece with it. It adds to the look.

I also outlined the cat with white paint to bring him out of the background. Add a little string to hang your piece by, and it's all ready to put out! Happy Haunting, and Please Subscribe to the You Tube Channel for more!!!

Wednesday, September 26, 2018

Halloween Decorations, How To Make a Primitive Mummy! Fast and Easy

I am always looking at decorations, and wondering if I could make that myself, and save money. This Primitive Halloween Mummy turned out to be very easy, and quick to do. It's so easy you could have the kids making their own in no time with things lying around the house.


Below I have included the photos for each step of the craft project.


Step 1: Pick out your 3 pieces for the Mummy (head, body, and base).

Step 2: Attach the head to the body. I used a metal piece with 4 holes, and drilled in 4 screws.

Step 3: Attach the body to the base. I used 2 screws going in through the bottom of the base.

Step 4: Wrap the Mummy in gauze, and add 2 eyes, and 2 arms. I placed Spanish moss here and there, and on the base just for an added "aged" effect. After that you are all finished, and ready to put your Mummy out for Halloween! See how easy that was. You may want to make an entire Mummy family it goes so fast. Happy Haunting!

Monday, September 10, 2018

A Fall Home Decorating Ideas Documentary

Fall is finally arriving, and it's time to get busy thinking of all of the ways you can decorate your home this year.


I have put together a few of my own ideas that I am using in the old Haunted House for Fall this year. Maybe you will become inspired by a few.
Below is the video with all of my ideas currently for this year, and a few photos just to fill up this page. Enjoy!


In the Kitchen

The Dining Room

The Living Room

Wednesday, November 4, 2015

Beautiful Fall Paper Pumpkins, DIY

See how to make these beautiful, and elegant Paper Pumpkins for your Fall table, or mantel display.


Tuesday, September 1, 2015

Are You Ready For Fall? Grab some ideas, and go!

I know What you're thinking. "There is plenty of summer left". Well, there is not, and soon you will be spending more, and more time inside, than out. Therefore it's time to take a look at what you will be seeing inside your home.

You don't want to come home to a place that will instantly make you unhappy, when there is so much more fun you can have with your living space. No matter where you live, it can always look nice if you try, and Fall is a good time to try. To the left you can see a leaf cup and saucer. I found those very inexpensive items at a little store, and thought they would look great on the kitchen table.
Little touches of fall silk leaves, pine cones, Indian corn, and pumpkins here and there don't yet speak of Halloween, but can help you to usher in the season. Adding spots of reds, oranges, greens, browns, and yellows will set the mood. It can also be the starting point to the rest of the holidays, up to, and through out Thanksgiving. It can serve as the basic, background decorations, and then all you would have to add is the ghost and ghouls, or turkeys and pilgrims to change the theme for the specific holiday. It really is as simple as that, and won't take up too much of your time, or energy, but it is going to make things much more enjoyable for you, and yours.
Trust me, your mood will improve tremendously when you enter your newly decorated home. Just picture yourself in a nice clean room with the little touches of Scarecrows, and berries, gourds, and candles. All you have to do is pick a day when you will clear that room, or rooms (depending on your motivation) of it's past clutter, clean it thoroughly, and place those memories of Fall in a few chosen spots. I would pick 2 or 3 per room to really liven it up. maybe a spot that you look at when you first walk in to the room.
You may pick a side table, and coffee table. If you are in the kitchen, it could be a corner, or center of an island, or the edge of a counter top, or the kitchen table. In my house, if you notice in the photos, I have done a little in every room, here and there, so it is visible at different places in the room. I have also placed wreaths, and decorated brooms, and garland on the walls. It is up to you on how far you want to take the decorating. You may wish to do a little in every room.
I always seem to take it to the limit, but it makes me happy when I get home. All to often we forget about our surroundings, and how they affect not only us, but those around us, and our outlook on life in general. I always choose to give myself the most positive habitat that is possible, and by that, I don't mean I spend a lot of money, but I do things to make the house a happy place. I want to make it somewhere I want to be. A place that re-energizes me. Isn't that, after all, what we want when we're home? So... Are you ready to be happy and positive in that place that you call home?
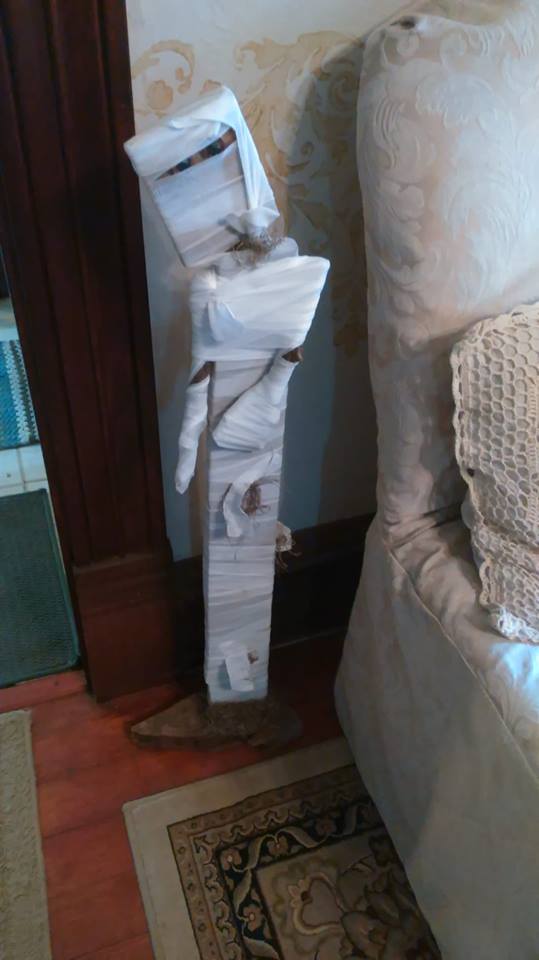
Note: All of the color photos are of my actual house, and the things I have come up with to create that "Old Fall Feeling". A feeling of warmth, and happiness that will spread into the other aspects of my life, and can only make it better. If you have your doubts, just try a few ideas, and see for yourself. Clear out the clutter, and make it better. After all, it couldn't hurt to try...
Be sure to let me know what it is that you have come up with. You and others can share your ideas in the comments below.
To see more photos from the House in Fall Click HERE

Tuesday, August 18, 2015

That Fall Feeling on a Budget...You Can Do It!

It's getting cooler outside, and soon it will be time for all to come back into the home. Why not make it the most inviting place that you can think of. A place that makes everyone feels good, safe, and happy.
Things you can do in your house to Create that Fall Feeling on a budget.
1. Pumpkins! If you forgot to grow them from seed, you can always pick up the smaller versions in stores. Weather real, or fake, they are inexpensive, and bring you that fall feeling.
2.Materials such as cottons in fall colors, and burlap overlapped on tables with your fall table-scapes are an excellent choice, and exactly what I do.
3. Don't forget those branches from outside in those table-scape arrangements, they look wonderful, and they cost nothing.
4. Gourds in the fall are colorful, and they bring their own feeling of warmth. They come in all shapes and sizes, and can keep for a very long time. Sometimes they even dry out, and you get to keep them forever! That's my kind of gourd.
5.Candles, Candles, Candles...did I say Candles. I love to use them for many things, and in places around the house. You don't even have to light them, they look great with fall silk leaves, and flowers around them! Or you could put tiny scarecrows, and crows, whatever comes to mind, and these things rarely cost very much, and sometimes you can find them at sales!
6. Wreaths, generally these are inexpensive, but if you want to save even more money, you can create your own, and best of all, it's one of a kind. You can place them on doors, walls, and even on staircases. The possibilities are endless.
7. Time to bring out the throws! Nothing say's fall like layering pillows, and blankets on furniture. Don't forget to use those fall colors.
There you have it. Easy, and quick ideas to make your house a special, and inviting home in the Fall.